How to set up email
This page has the settings you can use for all devices and applications, followed by specific instructions for iPhone, Android, Mac Mail, Outlook and Thunderbird.
Notice: secure settings are required to access email from all devices, unless you use webmail.
These are the settings for @northwestel.net and all other domains.
Find the email settings on your device. When prompted, please enter the following:
Incoming Messages
Option 1: IMAP Settings*
Host: imap.northwestel.net
Port: 993 (requires SSL)
* IMAP is recommended over POP3 to sync email on multiple devices.
Option 2: POP3 Settings
Host: pop3.northwestel.net
Port: 995 (requires SSL)
Outgoing Messages
For SMTP Authentication
Host: smtp-auth.northwestel.net (used for authentication on cell phones, tablets, laptops and desktop apps)
Security/Encryption: STARTTLS/SSL
Port: 587
Authentication: Yes (on Android cell phones, please check "log in required")
Username: <full Northwestel email address> (example: johndoe@northwestel.net)
Password: <Northwestel email password>
Video Instructions
Detailed Written Instructions
Step 1: Add your account
Click on the “Settings” icon.

Scroll down and click on “Mail”.
![]()
Click on “Accounts”. Then “Add Account”.
At the bottom of the screen, click on “Other”. Then select “Add Mail Account”.
Step 2: Fill out your account details
Name is the name you want people to see when you send a message from this mobile phone.
The description is automatically filled and can be changed.
Then click Next.
Step 3: Update account settings
Select the “IMAP” tab unless you require a POP3 setup. IMAP is the preferred option.
For IMAP, your settings need to look like this:
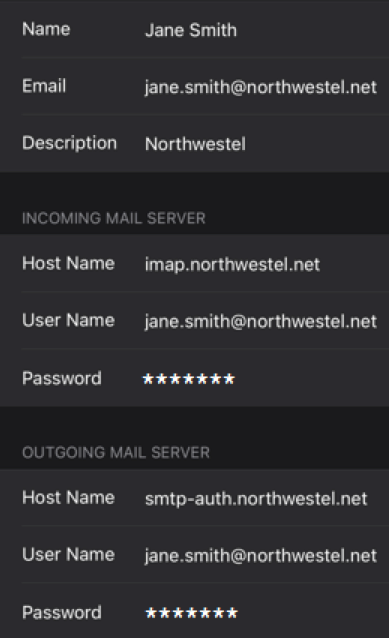
If you require a POP3 set up, your “Host Name” will be pop3.northwestel.net
Click Next.
Turn “Mail” on if it’s not already. Then click Save.
Step 4: Send and receive a test email
Open your “Mail” application.
Compose a test email and send it to yourself.
It may take a moment to arrive and remember to check your junk folder.
If you receive it, it means you are good to go!
If you did not receive it, retrace your steps, and check your settings again. If you require further assistance, please contact our call center at 1 888 423 2333.
Video Instructions
Detailed Written Instructions
Step 1: Add your account
Click on the “Email” application.

If you do not currently have a Northwestel email configured, click “other” then “Add Account” and skip to Step 2.
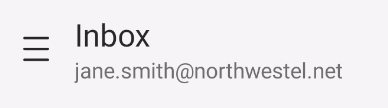
If you already have Northwestel email configured, click on the menu icon next to “Inbox”. Then click on the gear icon and click “Add Account”.
Step 2: Fill out your account details
Enter your email address for your username and your email password.
Click on “Manual setup”.
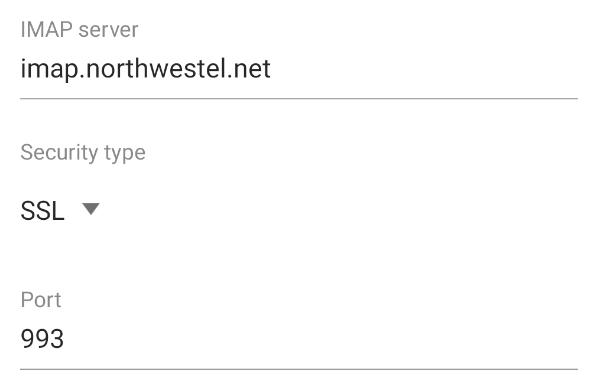
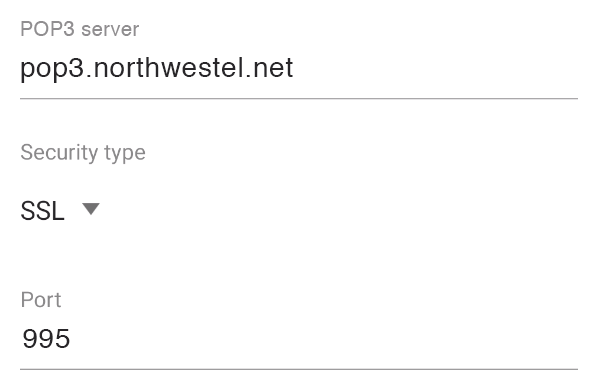
Step 3: Fill out your server details
Select “IMAP” unless you have a POP3 setup.
If you have IMAP, your Incoming server info needs to be like this:
If you have POP3 set up, your settings need to be like this:
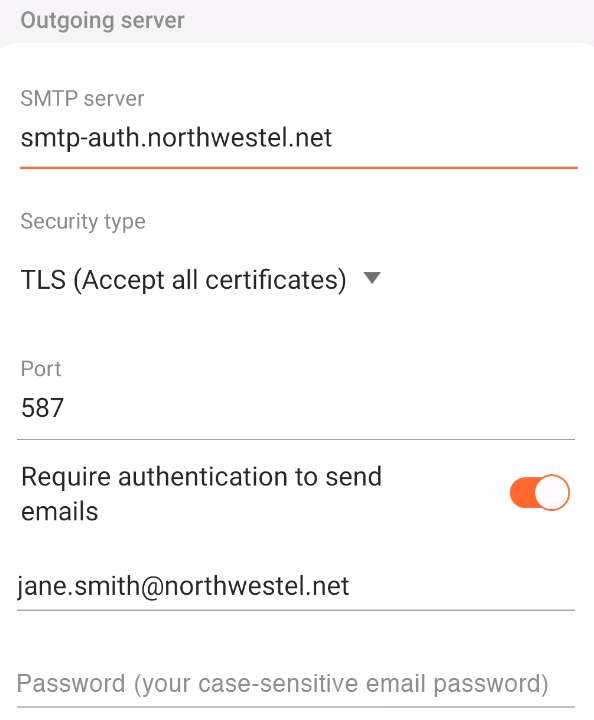
Everyone’s Outgoing server settings need to be like this:
Step 4: Send and receive a test email
Open your “Mail” application.
Compose a test email and send it to yourself.
It may take a moment to arrive and remember to check your junk folder.
If you receive it, it means you are good to go!
If you did not receive it, retrace your steps, and check your settings again. If you require further assistance, please contact our call center at 1 888 423 2333.
Video Instructions
Detailed Written Instructions
Step 1: Add your account
Open the “mail” application from the toolbar.
![]()
Click on “Mail” in the upper left, then select “Add Account”.
Select “Other Mail Account” at the bottom of the window.
Click “continue”.
Step 2: Fill out your account details
Fill out your account information with your name, Northwestel email address and Northwestel email password
Click “Sign In”.
Step 3: Fill out your server details
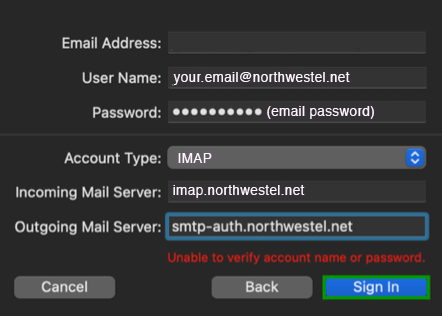
A notification will pop up that says “Unable to verify account name or password”.
If your “Account Type “ is IMAP, fill in the fields so your screen looks like this:
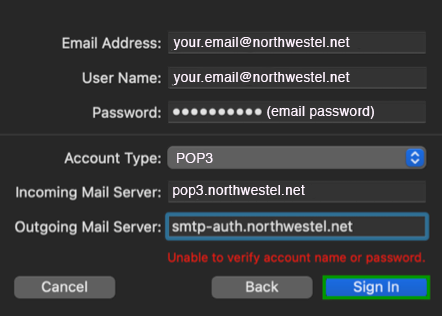
If your “Account Type” is POP3, fill in the fields so your screen looks like this:
Click on “Sign In”.
Select “Mail” and click on “Done”.
Step 4: Check your settings
Under “Accounts” select Northwestel email.
Click the “Server Settings” tab.
If you have IMAP set up, your screen should look like this:

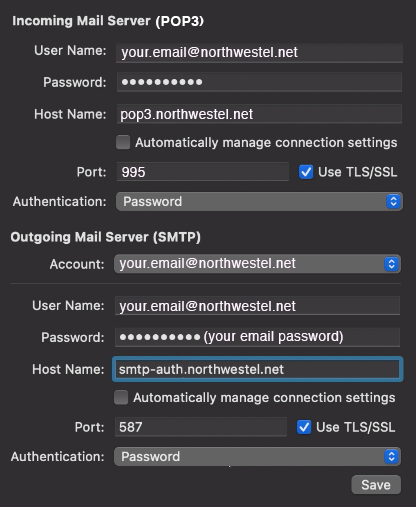
If you have a POP3 set up, your screen should look like this:
Click “Save”.
Step 5: Send and receive a test email
Open your “Mail” application.
Compose a test email and send it to yourself.
It may take a moment to arrive and remember to check your junk folder.
If you receive it, it means you are good to go!
If you did not receive it, retrace your steps, and check your settings again. If you require further assistance, please contact our call center at 1 888 423 2333.
Video Instructions
Detailed Written Instructions
Step 1: Add your account
Use the Search Bar to find “Control Panel”. 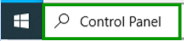 Click on it.
After clicking on Control Panel, make sure View by is set to Large icons or Small icons.
![]()
Find “Mail (Microsoft Outlook)”. 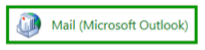 Double-click on it.
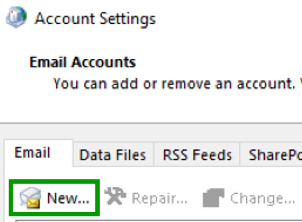
Click “Email Accounts”.

Click “New”.
Step 2: Fill out your account details
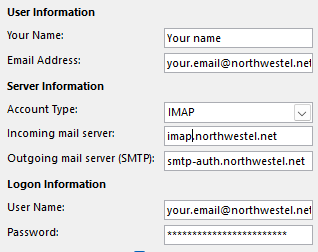
Fill out your account information. Your screen should look like this:
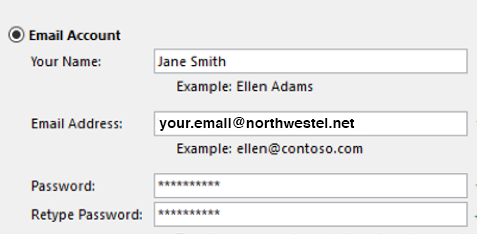
Select “Manual setup or additional server types”.
Click “Next”.
Step 3: Fill out your server details
Select “POP or IMAP”.
Click on “Next”.
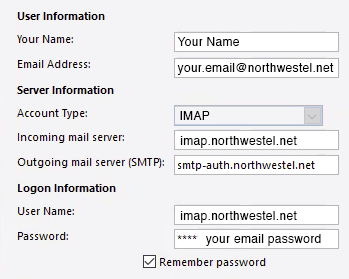
Your screen should look like this if you selected “IMAP” under “Account Type” (preferred):
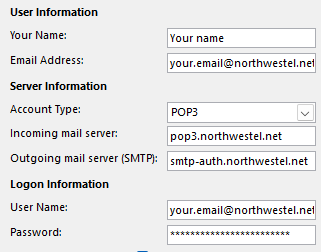
Your screen should look like this if you selected “POP3” under “Account Type”:
Click “More Settings”.
Click on the “Outgoing Server” tab.
Select “My outgoing server (SMTP) requires authentication. Then fill out the server information under “Log on using” with your email address and email password.
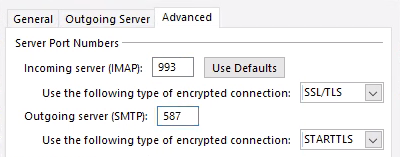
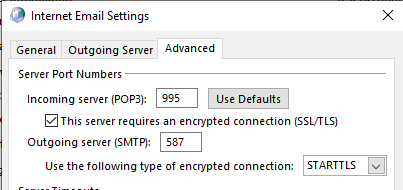
Click on the “Advanced” tab.
If you have IMAP, your screen should look like this:
If you have POP3, your screen should look like this:
Click “Okay”.
On the next screen, click “Next”.
If your settings are correct, a window will appear that looks like this:
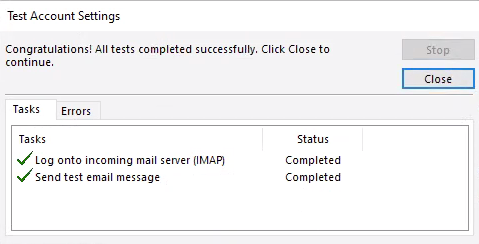
Click “Finish”.
Step 4: Send a receive a test email
Open your “Mail” application.
Compose a test email and send it to yourself.
It may take a moment to arrive and remember to check your junk folder.
If you receive it, it means you are good to go!
If you did not receive it, retrace your steps, and check your settings again. If you require further assistance, please contact our call center at 1 888 423 2333.
Detailed Written Instructions
Step 1: Add your account
Use the Search Bar to find “Control Panel”. Click on it.
After clicking on Control Panel, make sure View by is set to Large icons or Small icons.
![]()
Open the Mail application by double-clicking on it.
If this is your first timing opening Mail, you will see a welcome screen. Click "Add Account" to get started. If you've used Mail before, select the Settings Icon ( ) in the bottom left corner of the application and select Manage Accounts.

Select "Add account"
Step 2: Fill out your account and server details
Scroll down and select "Advanced Setup"
Enter your Email address, user name, and password for your email account. Your user name is the same as your email address.
For the rest, fill in your information as shown below:
For your “Outgoing Server” information, fill in your information as below.
Click “Finish”.
Step 3: Send a receive a test email
Open your “Mail” application.
Compose a test email and send it to yourself.
It may take a moment to arrive and remember to check your junk folder.
If you receive it, it means you are good to go!
If you did not receive it, retrace your steps, and check your settings again. If you require further assistance, please contact our call center at 1 888 423 2333.
Video Instructions
Detailed Written Instructions
Step 1: Add your account
Click on “Local Folders” and then on “Email”.

Fill out your account information. Name is the name you want people to see when you send a message from this computer.
Click on “Remember Password.” Then click “Configure Manually”.
Step 2: Update server settings
To get started, select IMAP from the “Protocol” drop down menu. If you require a POP3 set up, your settings will differ*.
For IMAP, your settings need to look like this:
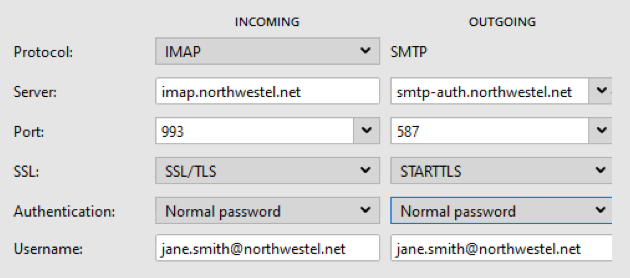
*If you require the POP3 set up, the Server is pop3.northwestel.net. The Port is 995.
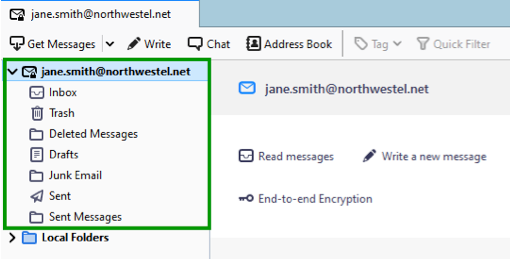
Click “Done”
If you’ve filled out the settings correctly, your email address should appear on the left.
Step 3: Send a receive a test email
Open your “Mail” application.
Compose a test email and send it to yourself.
It may take a moment to arrive and remember to check your junk folder.
If you receive it, it means you are good to go!
If you did not receive it, retrace your steps, and check your settings again. If you require further assistance, please contact our call center at 1 888 423 2333.