Smart Wi-Fi Mesh Extender - Everything You Need to Know
This article offers comprehensive, step-by-step guidance for installing your Northwestel Wi-Fi Mesh Extenders. It covers best practices, common mistakes to avoid, what to expect during setup, and expert tips to help you maximize your home’s wireless coverage.
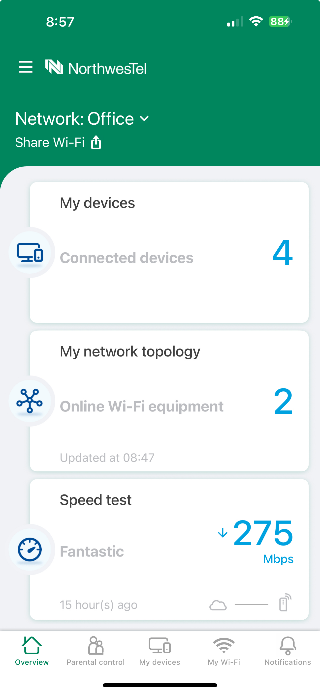
Extend Wi-Fi coverage to hard-to-reach areas like basements, garages, or faraway rooms.
Steps:
- Plug the extender into a power outlet positioned halfway between your modem and the area with poor Wi-Fi coverage. Wait approximately 10 minutes for the device to power up and connect.
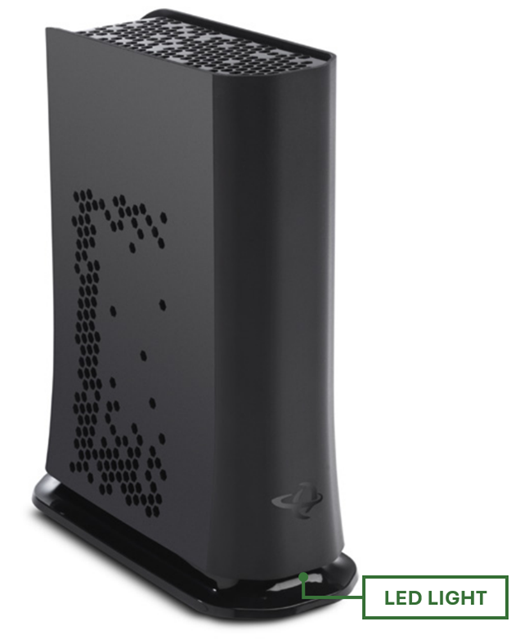
- Once the LED begins blinking white, the extender is ready to pair.
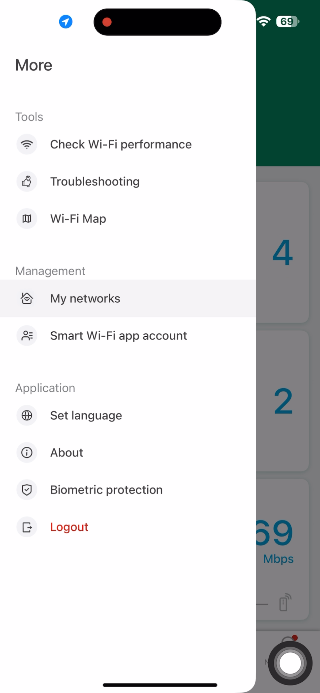
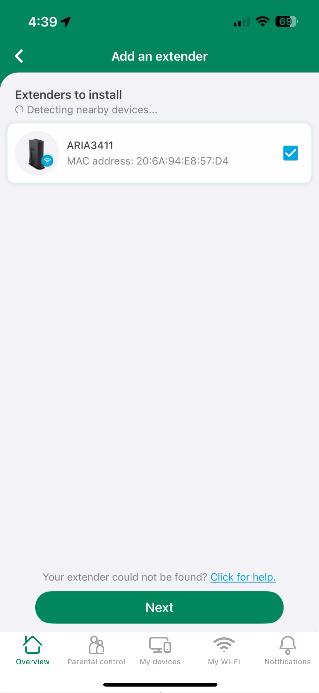
- Launch the Smart Wi-Fi app. In the top-left corner, tap the Menu icon, then choose My Networks.
- Tap Add Extender and wait for nearby devices to be detected.

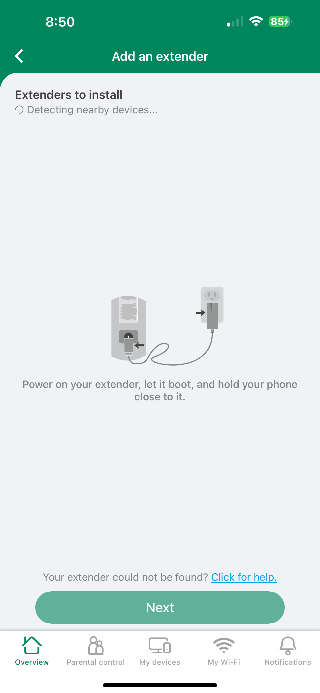
- Once the list of detected extenders appears, check the box next to the desired device and click Next.
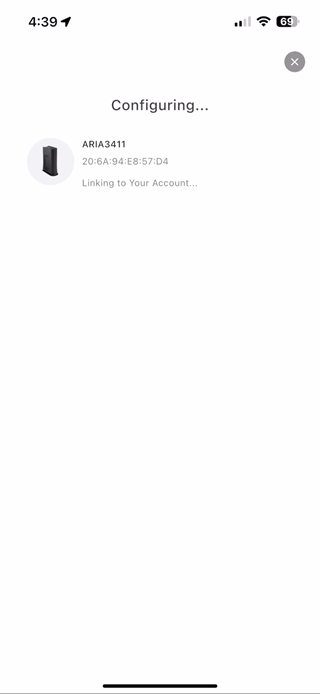
- You’ll be prompted with the installation status. Make sure the extender is successfully installed.

Tips/Notes:
For the best performance, reposition the extender slightly until you find the strongest signal.
Proper placement is essential for your extender to perform at its best. Positioning it in the right spot helps eliminate dead zones and enhances coverage exactly where you need it.
Follow these steps to ensure optimal placement and performance:
- Position the extender halfway between your modem/router and the area with weak Wi-Fi coverage.
- Avoid physical obstruction, don’t place the extender behind large furniture, near microwaves, or next to thick walls.
- Ensure it’s within range of your modem’s signal. The extender can only amplify what it receives, so a strong connection is key.
- After setup, test the Wi-Fi in the previously weak area to confirm that coverage has improved.
Tips/Notes:
- Fine-tune placement by adjusting the extender slightly until you find the optimal “sweet spot” for signal strength.
- Covering multiple weak zones? You may need to install additional extenders in different areas of your home to ensure seamless coverage.
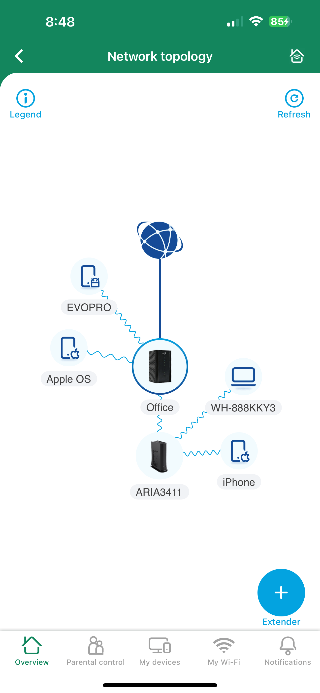
Once your Mesh Wi-Fi Extenders are set up, they seamlessly integrate with your modem to deliver a stronger, more consistent Wi-Fi signal throughout your home.
What happens next:
- Smart Signal Switching
As you move through your home, your devices will automatically connect to the strongest available signal—no manual switching needed.
- Better Coverage, Fewer Dropouts
Areas that previously had weak or no Wi-Fi (aka “dead zones”) should now enjoy stronger coverage and more stable connections.
- Variable Speeds
Wi-Fi speeds may fluctuate slightly depending on how far you are from the extender and how many walls or obstacles there are on the way.
Tips/Notes:
- Optimize Placement
If a certain spot still feels sluggish, try repositioning the extender or consider adding another one for full-home coverage.
- No Network Switching Required
Your devices will automatically stay connected to the best signal—no need to manually change networks or settings.
Sometimes a single extender isn’t enough to blanket your entire home in strong, reliable Wi-Fi. Here’s how to tell if it’s time to expand your mesh network:
Signs you may need another extender:
- Persistent Weak Spots
Certain rooms or corners still suffer from poor signal or slow speeds.
- Multi-Level or Large Layouts
Homes with multiple floors or wide layouts may have areas out of reach from a single extender. You notice frequent buffering, dropping calls, or slow speeds in specific areas.
- Performance Issues
You’re experiencing buffering, dropped video calls, or sluggish internet in specific zones.
- Unstable Handoffs
Devices farther from the modem don’t transition smoothly between the modem and extender, causing interruptions.
Tips/Notes:
- Larger Homes Need More Coverage
For spacious or multi-story homes; multiple extenders may be necessary to eliminate dead zones.
- Create a Coverage Chain
Position each extender within range of the modem or another extender to maintain a strong signal link throughout your home.